Uncategorized
Instruction for Installation and Operation of EverEV wall-mounted charger
![]()
![]()
PRODUCT OVERVIEW
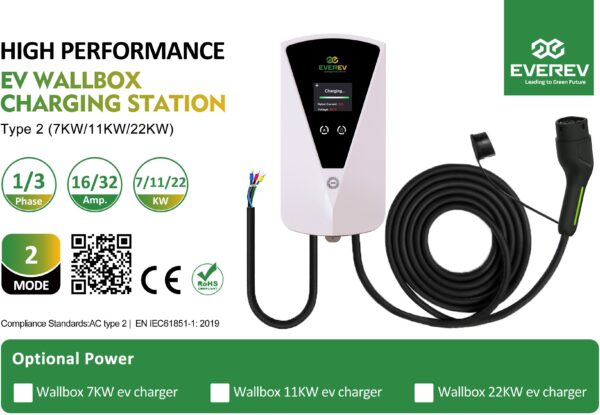
This device is an AC charger used to charge electric vehicles with AC power. The equipment consists of the charger body, wall-mounted bracket, column, and optional floor-mounted base, among other features. It offers various charging modes, such as card activation and customizable charging schedules. The charger is designed based on industrial principles, making it easy to install and user-friendly.
Appearance: Sleek and elegant design with multiple color options.
Protection: IP54-rated protection (waterproof and dustproof) for durability in windy, rainy, and sunny conditions.
Operation: Simple and convenient operation, specifically plug-and-charge functionality.
Safety: Multiple levels of protection, upgraded safety features, high-quality materials, fire-resistant, waterproof, and dustproof.
Common Features: Compact size, high charging efficiency, compatibility with 99% of modern electric vehicle models.
Quality: Pure copper inner core wire to prevent oxidation, compliant with certification standards, impact-resistant, and fire-resistant.
The charger’s performance meets the standards set by IEC 62196-2-2011 (Plugs, socket-outlets, vehicle connectors, and vehicle inlets – Conductive charging of electric vehicles) and the related provisions of IEC 61851-1-2012 (Electric vehicle conductive charging system). It also conforms to the “Typical Design of Electric Vehicle Charging Equipment” in the design function. The product fully complies with national standards and industrial standards for electric vehicles.
CHARGER INTERFACE
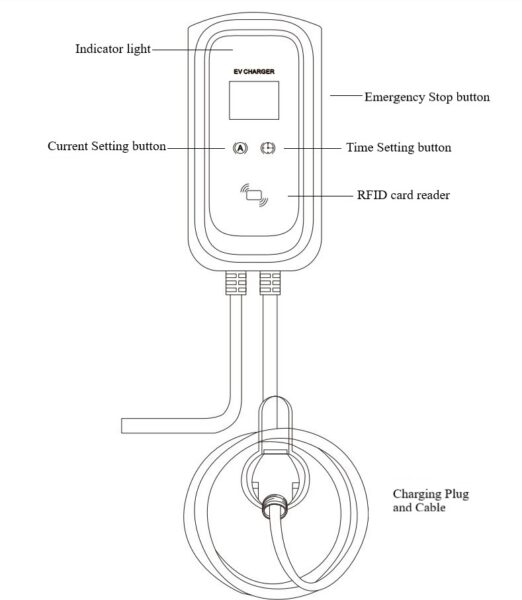
Dimensions: 310 x 160 x 90 (mm)

Technical information
| General information | Rated power | 7kW | 11kW | 22kW |
| User interface | Warning light, Screen, Current setting button, Time setting button | |||
| Charging cable direction | Input and output cable on the bottom of the device | |||
| Dimensions | 310 x 160 x 90mm | |||
| Input Voltage | 200-220V 1 phase | 380-440V 3 phase | 380-440V 3 phase | |
| Frequency | 50Hz | |||
| Output Voltage | 200-220V | 380-440V | 380-440V | |
| Output Curent | 8-32A | 8-16A | 8-32A | |
| Cable length | 3/5/8/10m | |||
|
Safety design | Overcurrent protection | ≥110% | ||
| Overvoltage protection | 265vAC 1 phase; 460vAC 3 phase | |||
| Undercurrent protection | 175vAC 1 phase; 310vAC 3 phase | |||
| Overheat protection | 80°C | |||
| Current leakage protection | 30mA | |||
| Software design | Function | Automatic charging, Card reader, Timer, App control | ||
| Communication | Blutooth | |||
| Operating environment | Operating temperature | -30°C – 50°C | ||
| Operating humidity | -5% – 95% No condensation | |||
| Altitude | <2000m | |||
| Protective rating | IP54 | |||
| Cooling | Natural cooling | |||
| Lifetime | 50.000 giờ | |||
Installation

Setting up
 1. Ensure the device is connected to an energy source. Press the A button or the Clock button twice to set charging current or set a timer based on your needs. | 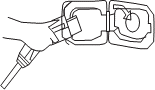
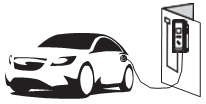
2. Connect your vehicle to the charger by inserting the plug into the charging port. |  3. Swipe the RFID card or the app to start the charging session. |
 4. The vehicle is charged | 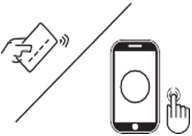 5. Swipe the RFID card again or use the app to stop the charging session |  6. Unplug then roll the cable around the shelf. |
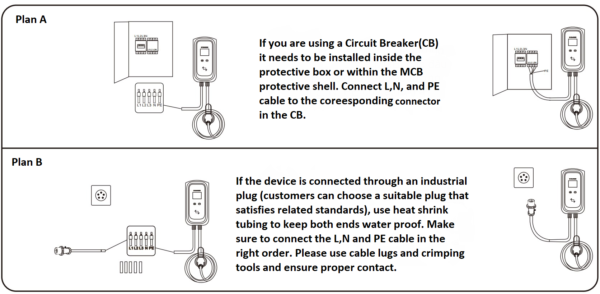
Wiring the device step by step (1 phase; 7kW)

Wiring the device step by step (3 phase; 11kW / 22kW)
Indicator LED screen

Notices and Warnings
– Only use when an RCD protector is installed.
– Do not use if the cable is damaged
– Only use to charge Electric Vehicles
– The device must be grounded.
– DO NOT step on, pull on, bend or tie the cable.
– Do not insert finger into the plug
– Do not install without instruction from a professional
– Do not use when the inside of the plug is wet.
– Do not install before reading the Installation instruction
– Do not use for purposes beside charging EVs
SPECIAL NOTICE:
– Under no circumstances should you disasesemble the device as this can damage the delicate and precise parts within the device, therefore invalidating the warrenty.
TABLE OF FAULT(FAULT INDICATOR)
| OPERATION STATUS | RED | GREEN | STATUS |
| Device is on (not plugged) | / | ON | / |
| Device in on(not charging) | / | BLINKING | / |
| Charging mode | / | / | BLINKING |
| Finished charging | / | / | ON |
| Communication error | Flash once (E1) | / | / |
| Source voltage low warning | Flashes twice (E2) | / | / |
| Overvoltage warning | Flashes 3 times (E3) | / | / |
| Grounding error | Flashes 4 times (E4) | / | / |
| Overcurrent protection | Flashes 5 times (E5) | / | / |
| Longterm overcurrent protection | Flashes 6 times (E6) | / | / |
| Leaking current protection | Flashes 7 times (E7) | / | / |
| Overheat protection | Flashes 8 times (E8) | / | / |
| Emergency stop | Flashes 19 times (E9) | / | / |
| Faulty RFID card | Flashes 10 times (E10) | / | / |
| Faulty relay | Flashes 11 times (E11) | / | / |
| Faulty relay | Flashes 12 times (E12) | / | / |
| Faulty memory | Flashes 13 times (E13) | / | / |
| Exceeded time | Flashes 14 times (E14) | / | / |
Notice: Fault flashing frequency is 0,5s, stops for 2s, then repeat
Solutions
| Lỗi | Nguyên Nhân | Khắc Phục |
| Overvolt AC | Input voltage is too high | 1. If the voltage exceeds 235VAC for a short period of time, wait for the grid voltage to normalise. 2. Check the energy source to see if the area’s voltage is high for a long period of time 3. Install a voltage stabalizer |
| Undervolt AC | Input voltage is too low | Check the energy source to see if the area’s voltage is low for a long period of time (205vAC) Install a voltage stabalizer |
| Overcurrent AC | Input current too high | 1. Flip the switch for short circuit protector, leak current protector and the distribution board. 2. Check for short circuits on the AC stake’s output cable 3. After performing these tasks, try turning on the charger again. If the fault persists, please call us. |
| Overheat | AC stake temperature is too high | Check the position of the AC stake, check for devices in the area, make sure the surrounding area is under 50°C |
| Leaking current | Leaking current above threshold | 1. Flip the current leak protector switch immediately 2. Check the AC stake’s cable for exposed parts, contacting ground or short circuiting. 3. After performing these tasks, try turning on the charger again. If the fault persists, please call us. |
| Ground fault | Input/output grounded or L/N cable is switched | 1. Flip the current leak protector switch 2. Check if the grounding cable is properly connected and if the L and N cables are connected right 3. After performing these tasks, try turning on the charger again. If the fault persists, please call us. |
| Unstable communication | Internet communication error | Check if the internet cable is properly plugged and is not damaged |
| Charger connection error | CC/CP connection error | 1. Check if the charger’s base configuration is correct 2. If the error persists please contact us |